How To Soundproof A Room?
Soundproofing is the prevention of noise leakage from one part of a structure, though to the other side. Many people just associate soundproofing with homemade studios and egg boxes on the walls. However soundproofing applications can be made invisibly discreet or aesthetically well designed to blend with your rooms decor, soundproofing has been proven in many structures worldwide from commercial businesses, public services to schools and leisure, sound proofing processes have evolved and got better.
Today I am going to talk about sound proofing methods from basic to the more advanced.
Basic Methods
- One basic method is having the room carpeted with a thick underlay if you have hard floors use a large thick rug to help dampen the eco effect, if you have a coving boarder keep it! as it smooths out sound reflection angles and reduces delay in receiving sound effects. For doors and windows Install sound curtains or thick acoustic blinds, for the wall you can absorb a little sound by mounting thick blankets to the wall.
- One other basic method is to use bookcases. You can make walls thicker and more soundproofed by simply making use of bookshelves. Cover a wall in bookshelves and books for a fairly effective sound barrier. Plus, you get a nice library out of the deal.
- Reduce vibrations. Have you ever turned up for music really loud and noticed a, rattling vibration sound more than anything else? This is because your speaker or subwoofer is vibrating either against the wall or making something else in the room breakdance off a shelf, to overcome this you’re going to want to fix these items down to reduce movement. Use rubber mats, feet or vibration insulation pads to sandwich the gaps and isolate their movement.
- Install a door sweep. Nail a rubber loop to the base of a door to block the gap. If the gap is too large to cover with a sweep, nail a strip of lumber to the base of the door first.
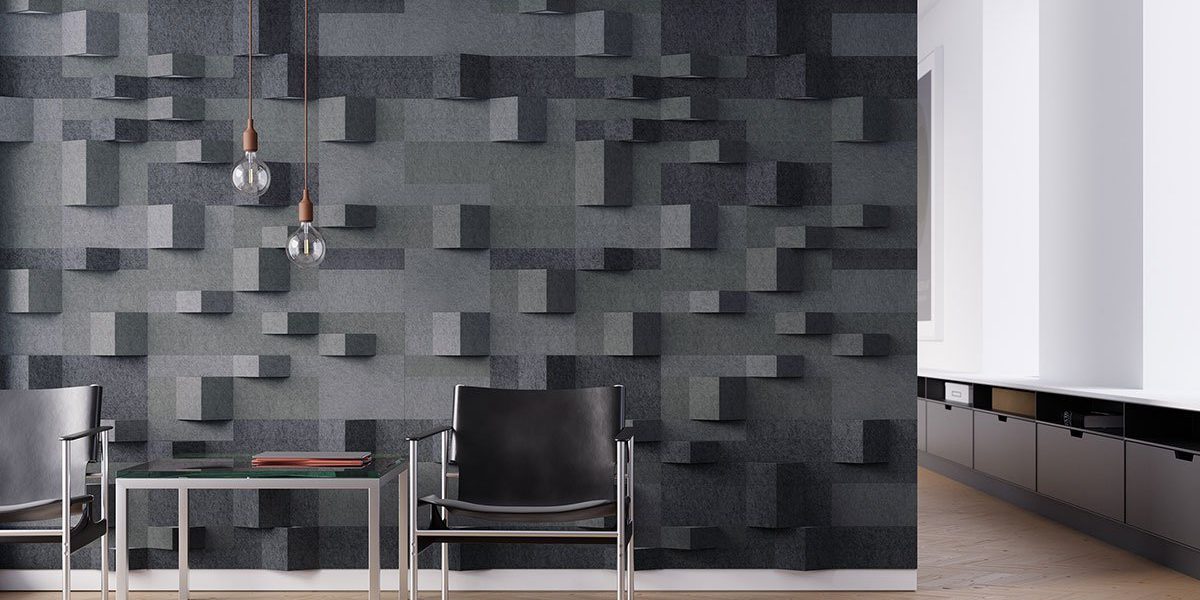
- Use acoustic wedge panels. Purchase 300mm x300mm wedge panels with a 50mm depth curve relief. These do well to absorb low to high frequencies. Some panels come already with an adhesive peel. Use 3M spray adhesive to glue the panels to the walls and ceiling if it doesn’t come with adhesive peel. You can cover all or just parts of the surface, depending on the amount of dampening you desire. This cuts down on the ‘noise’ inside the room and will ensure clear crisp effects with no echo delay, this is especially important if it’s a home cinema or media Room.
Use a sound panel that is mostly fiberglass with a thin Mylar perforated facing. These types of panels have the highest ratings in sound absorption values among almost all but the most expensive specialty tiles. They will give you far more return on your investment than any other on the market.
Advanced Methods
1.if you are renovating or building a new structure for a more discreet setup use acoustic plasterboard, it’s denser than standard plasterboard material and will absorb more sound. Use at least (12mm) in thickness.
If you are improving on an existing wall, build a basic wall frame with 400mm spacing and at least 50mm deep attach it to the existing wall surface, fill the 400mm gaps with sound insulation and cover with a new layer of acoustic plasterboard.
- Separate the two layers of wall. Whenever sound travels through a wall and into a new substance, some of its energy is absorbed, and some is reflected. Increase this effect by building the wall from two sheets of acoustic plasterboard, with as much space between them as possible. This is called decoupling.
Decoupling actually makes the wall worse at blocking low frequencies, due to the resonance of the wall. If the gap is only (20mm) or less, a damping compound is highly recommended to fight this effect.
- Plan your stud placement. Most walls contain a single row of studs touching both layers of wall. Sound travels easily through these studs, which can cancel out a great deal of work. choose A or B below for best results.
A double row of studs, one along each interior side. This is the most soundproof method but requires enough space to leave a gap between the two rows.
B staggered row of studs, alternating placement along one interior side, then the other.
- Consider sound clips or channels. These are placed between the studs and the acoustic plaster board, providing an additional barrier for sound. There are two main options:
Sound clips are the most effective method, absorbing sound with heavy rubber components. Screw them into the studs, insert a hat channel, then screw the drywall into the channel.
Resilient channel is a springy metal channel designed for soundproofing. Screw this to the studs and drywall using offset screws, this may improve high-frequency blocking at the expense of low frequencies.
- Fill walls with a damping compound. This magical substance converts sound energy to heat. This can be used between layers of wall, floor, or ceiling. Unlike most other methods, this should absorb low-frequency noise. This makes it ideal if you expect loud bass from music and home theatre systems.
When sourcing this it is sold as noise proofing glue or viscoelastic adhesive. - Insulate with other material. Damping compound is one of the best all-purpose sound proofers, other insulation materials A&B types
A Fiberglass is cheap and fairly effective
B Celotex foam insulation is more expensive and also fairly effective but only with 2x layers of acoustic plasterboard for the final covering.
- Fill cracks with acoustical caulk. Even small cracks and gaps between materials can undermine sound proofing. Special acoustical caulk (also sold as acoustical sealant) fills these gaps with an elastic, sound-resistant material. Fill all cracks, as well as seams around the walls and windows.
- Soundproof floors and ceilings. Floors and ceilings can be soundproofed using many of the same systems suitable for walls. Most commonly, homeowners add an additional layer (or two) of acoustic plasterboard, with dampening glue in between. As a simple additional step, cover the floor with soundproofing mats, then install carpet with a thick underlay.
You do not need to soundproof the floor if there is no room below you!
Heavy concrete ceilings won’t benefit much from the additional mass of drywall and damping compound. Instead, add an acoustic plasterboard layer with an air gap in between, or fill the gap with fiberglass insulation.
- Install soundproofing panels. If the soundproofing in your completed room is not substantial enough, you can also use acoustic panels. Cheap options are available, but the more expensive panels may be more effective.
- A mix methods can be taken into consideration. Many people will desire the discreet plastered over methods but in reality, this is a bespoke application that can only be done during a renovation or new construction by a builder. If you don’t have a build project, then there are lots of off the shelf alternative’s that can be found online to suit many room themes by typing “acoustic sound panels” or “acoustic blankets” into Google. If you get stuck trying to find the right solution, then message us we are happy to advise for free.
Would you consider a media cabin in the garden? If so click here
FREE Acoustic Survey
If you are interested in the purchase of a Home Cinema or Music System from us, then we will look to beat any competitor quote and offer you a Free Acoustic Survey.
Please call us on 07738126366, email me direct on robin.barnes@digicastav.co.uk or click here to email us


